
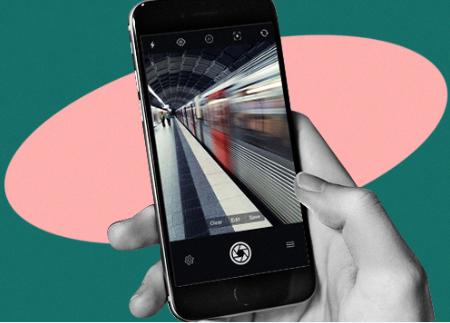
Low-light photography can be a challenging endeavor, as dim lighting often results in grainy images, muted colors, and loss of detail. However, with the right techniques and a good camera filter app, you can transform dark, blurry photos into clear, vibrant shots. Below, we’ll outline several effective tips and tricks to help you enhance low-light photography using your favorite filter apps.
Techniques to Improve Low-Light Photos with Camera Filter Apps
By adjusting key settings and using specific features, you can make the most out of your low-light shots. Here’s how to get started.
Start by Reducing Noise
Low-light photos tend to have a lot of noise—tiny speckles that distort the image quality. One of the first steps in enhancing these images is to use the noise reduction feature found in most camera filter apps like Snapseed, Lightroom, or VSCO. Lowering the noise helps smooth out the image, making details clearer. However, be careful not to overdo it, as too much noise reduction can make your image look overly soft and unnatural. Strike a balance to maintain clarity without losing texture.
Increase Brightness and Adjust Exposure
The main issue with low-light images is that they often appear too dark. Increasing the brightness and exposure levels can make your photos more visually appealing. Most camera filter apps have easy-to-use sliders for this. Gradually increase the brightness until you can see more details, and adjust the exposure to bring out highlights without overexposing certain areas. This technique helps illuminate the subject while retaining the atmosphere of the original shot.

Use the Shadows and Highlights Tool
Shadows and highlights adjustments are essential for enhancing low-light images. By increasing the shadows, you can bring out hidden details in the darker areas, making the overall image look clearer and more balanced. Conversely, adjusting the highlights can tone down overly bright spots, creating a more even lighting effect. Most apps like Lightroom and Snapseed allow you to tweak these settings independently, giving you better control over your photo’s lighting.
Apply a Subtle Sharpening Effect
Low-light conditions can cause photos to appear blurry or lacking in definition. Use the sharpening tool in your camera filter app to enhance the clarity of your image. Increasing sharpness brings out fine details and makes the image appear crisper. However, as with noise reduction, too much sharpening can lead to an unnatural look, so apply this effect moderately. Focus on making key areas like facial features or textural details stand out.
Enhance Colors Using the Saturation and Vibrance Sliders
Low-light images often look dull and washed out due to a lack of light. Using the saturation and vibrance sliders can restore life to your photos by making colors pop. Saturation affects all the colors in your image, while vibrance selectively boosts only the muted tones, preventing oversaturation. Choose vibrance when you want to enhance colors subtly without losing detail in brighter areas.
Use Vignette to Focus Attention on the Subject
A vignette effect—darkening the corners of the image—can be a great way to draw the viewer’s attention to the brighter center of your photo. This effect is particularly useful in low-light photography, as it enhances the subject and minimizes the distractions caused by dark backgrounds. Applying a slight vignette can help make your main subject stand out and add a professional touch to your photo.
Finish with Selective Editing for a Refined Look
Selective editing tools allow you to make adjustments to specific areas of your image, rather than affecting the whole picture. Use this feature to brighten up a person’s face, sharpen a specific object, or adjust the color in certain areas without impacting the entire image. Apps like Lightroom and Snapseed offer brush or radial filters for this purpose, giving you precise control over how your edits appear.
Conclusion
Enhancing low-light photos doesn’t have to be difficult when you know how to use the tools provided in camera filter apps. By following tips here, you can turn grainy, dark images into professional-quality photos. Remember to apply each effect subtly to maintain a natural look, and experiment with different settings to find the perfect balance for your unique shot.